> For the complete documentation index, see [llms.txt](https://docs-eb.toneden.io/llms.txt). Markdown versions of documentation pages are available by appending `.md` to page URLs; this page is available as [Markdown](https://docs-eb.toneden.io/promo-codes/multi-event-promo-codes-faq.md).
# Multi-Event Promo Codes FAQ
* What are Promo Codes?
* What is the difference between a Discount Code and an Access Code?
* How do I create a Multi Event Promo Code?
* How do I bulk create promo codes for my events?
* How do users apply a promo code to my event?
* How do I delete, update, or share existing codes?
* How do I see promotion code usage?
### What are Promo Codes?
Within Eventbrite, there's **two types of promo codes** a creator may make for their event(s):
**Event-level Promo Codes** (located in Ticket settings under Mange My Events) and **Multi-Event Promo codes** (located within the [Boost Marketing tab](https://www.eventbrite.com/organizations/promotions)). This article is concerned with **Multi-Event Promo Codes.** If you need to create a code that only applies to a single event, follow [these steps instead](https://www.eventbrite.co.uk/support/articleredirect?anum=3295).
Promo Codes allow consumers to **apply a discount** to their ticket, or **unlock hidden ticket-types** with an access code.
**Event-level Promo Codes** are codes that buyers can redeem **for one, specific event.** They cannot be used for any other event your organization is hosting. As mentioned above, these may be created in the Ticket settings of your event.
**Multi-Event Promo codes** allow creators to make promo codes that buyers can apply across various events. In order to create a multi-event promo code, you must first select the "Marketing" icon on the left hand side of your screen which will take you to Eventbrite Boost. From here, you may select the "[Promo Codes](https://www.eventbrite.com/organizations/promotions)" tab to get started!
### What is the difference between a Discount Code and an Access Code?
A **discount code** lets the buyer apply a discount to their selected ticket. The discount itself is determined when making the promo code.
An **access code** lets the buyer "unlock" hidden ticket-types that are not available to the public.
Before creating an **access code,** you need to have hidden tickets. To hide a ticket type:
1. Go to “Tickets”.
2. Click the name of your ticket type.
3. Click “Advanced settings”.
4. Change the visibility to “Hidden”.
### How do I create a Multi Event Promo Code?
In order to create a multi-event promo code, you must first select the "Marketing" icon on the left hand side of your screen which will take you to Eventbrite Boost. From here, you may select the "[Promo Codes](https://www.eventbrite.com/organizations/promotions)" tab to get started.
**1. Choose your code type.**
There are two types of codes:
* Discount code — apply a lower price to tickets that are visible to anyone.
* Access code — reveal tickets that are hidden.
Before creating an access code, you need to have hidden tickets. To hide a ticket type:
1. Go to “Tickets”.
2. Click the name of your ticket type.
3. Click “Advanced settings”.
4. Change the visibility to “Hidden”.
**2. Choose the tickets the code should apply to.**
If you want to apply the code to all tickets across your events, select **ALL events ALL tickets**. This applies to current events and upcoming events you create and can't be changed after you create your code.
If the code should apply to specific ticket types, choose an existing ticket group or click **A new group of tickets**. If you choose to create a new group, find and select all the ticket types for this group.
\
**3. Set up your code.**
* Code type: Choose between a single code or CSV list. Choose **CSV list of codes** if you want to bulk create codes with the same settings. If you choose to upload a file, create a CSV file that separates your codes by commas or on separate lines. Upload up to 5,000 codes per file.
* Code name: This is what attendees enter during checkout. For example, if your code gives a 10% discount, your code name could be “SAVE10”.
* Discount amount: Set this to a fixed amount or percentage to be taken off of the full price of your ticket (like $100 or 100%).
* Limit of uses: Leave as unlimited or set a limit on how many tickets can use this code.
* Starts/Ends: Decide how long this code will be valid. By default, promo codes work as long as the tickets are available. You can change your settings so your promo code starts or ends on a certain date or a certain amount of time before the event.
When you're happy with your settings, click **Continue**.
**4. Give your ticket group a name.**
If you selected **A new group of tickets**, give the group of tickets a ticket group name.
This step doesn’t apply if you selected **ALL events ALL tickets** or an existing ticket group.
**5. You're all ready to set the code live!**
### How do I bulk create promo codes for my events?
Multi Event Promo Codes are helpful if you need to give out personalized codes or use a voucher system (like Groupon). First put the codes into a CSV or TXT file. Then, upload it to Eventbrite by going to “Promo codes”. Select “More options”, then choose “Upload promo code CSV”. Bulk created codes have the same settings for each code. If you need different types of codes, upload them in separate files.
**1. Create a file of your codes.**
Using an outside program (like Microsoft Excel or Google sheets), create a file of your codes. Your file should:
* Be plain text (TXT or CSV format)
* Have codes separated by commas or on separate lines
* Have no spaces, apostrophes, or non-alphanumeric characters (except "-", "\_", "(", ")", "/", "\\", "+", "@", and ".")
* Have no more than 500 codes per file
* Have no more than 256 characters per code
All codes will have the same settings. If you need to create different types of codes (like codes that grant 1 ticket and codes that grant 2 tickets), create separate files.
**2. Select "CSV list of codes"**
Select Browse and choose your file from your device.
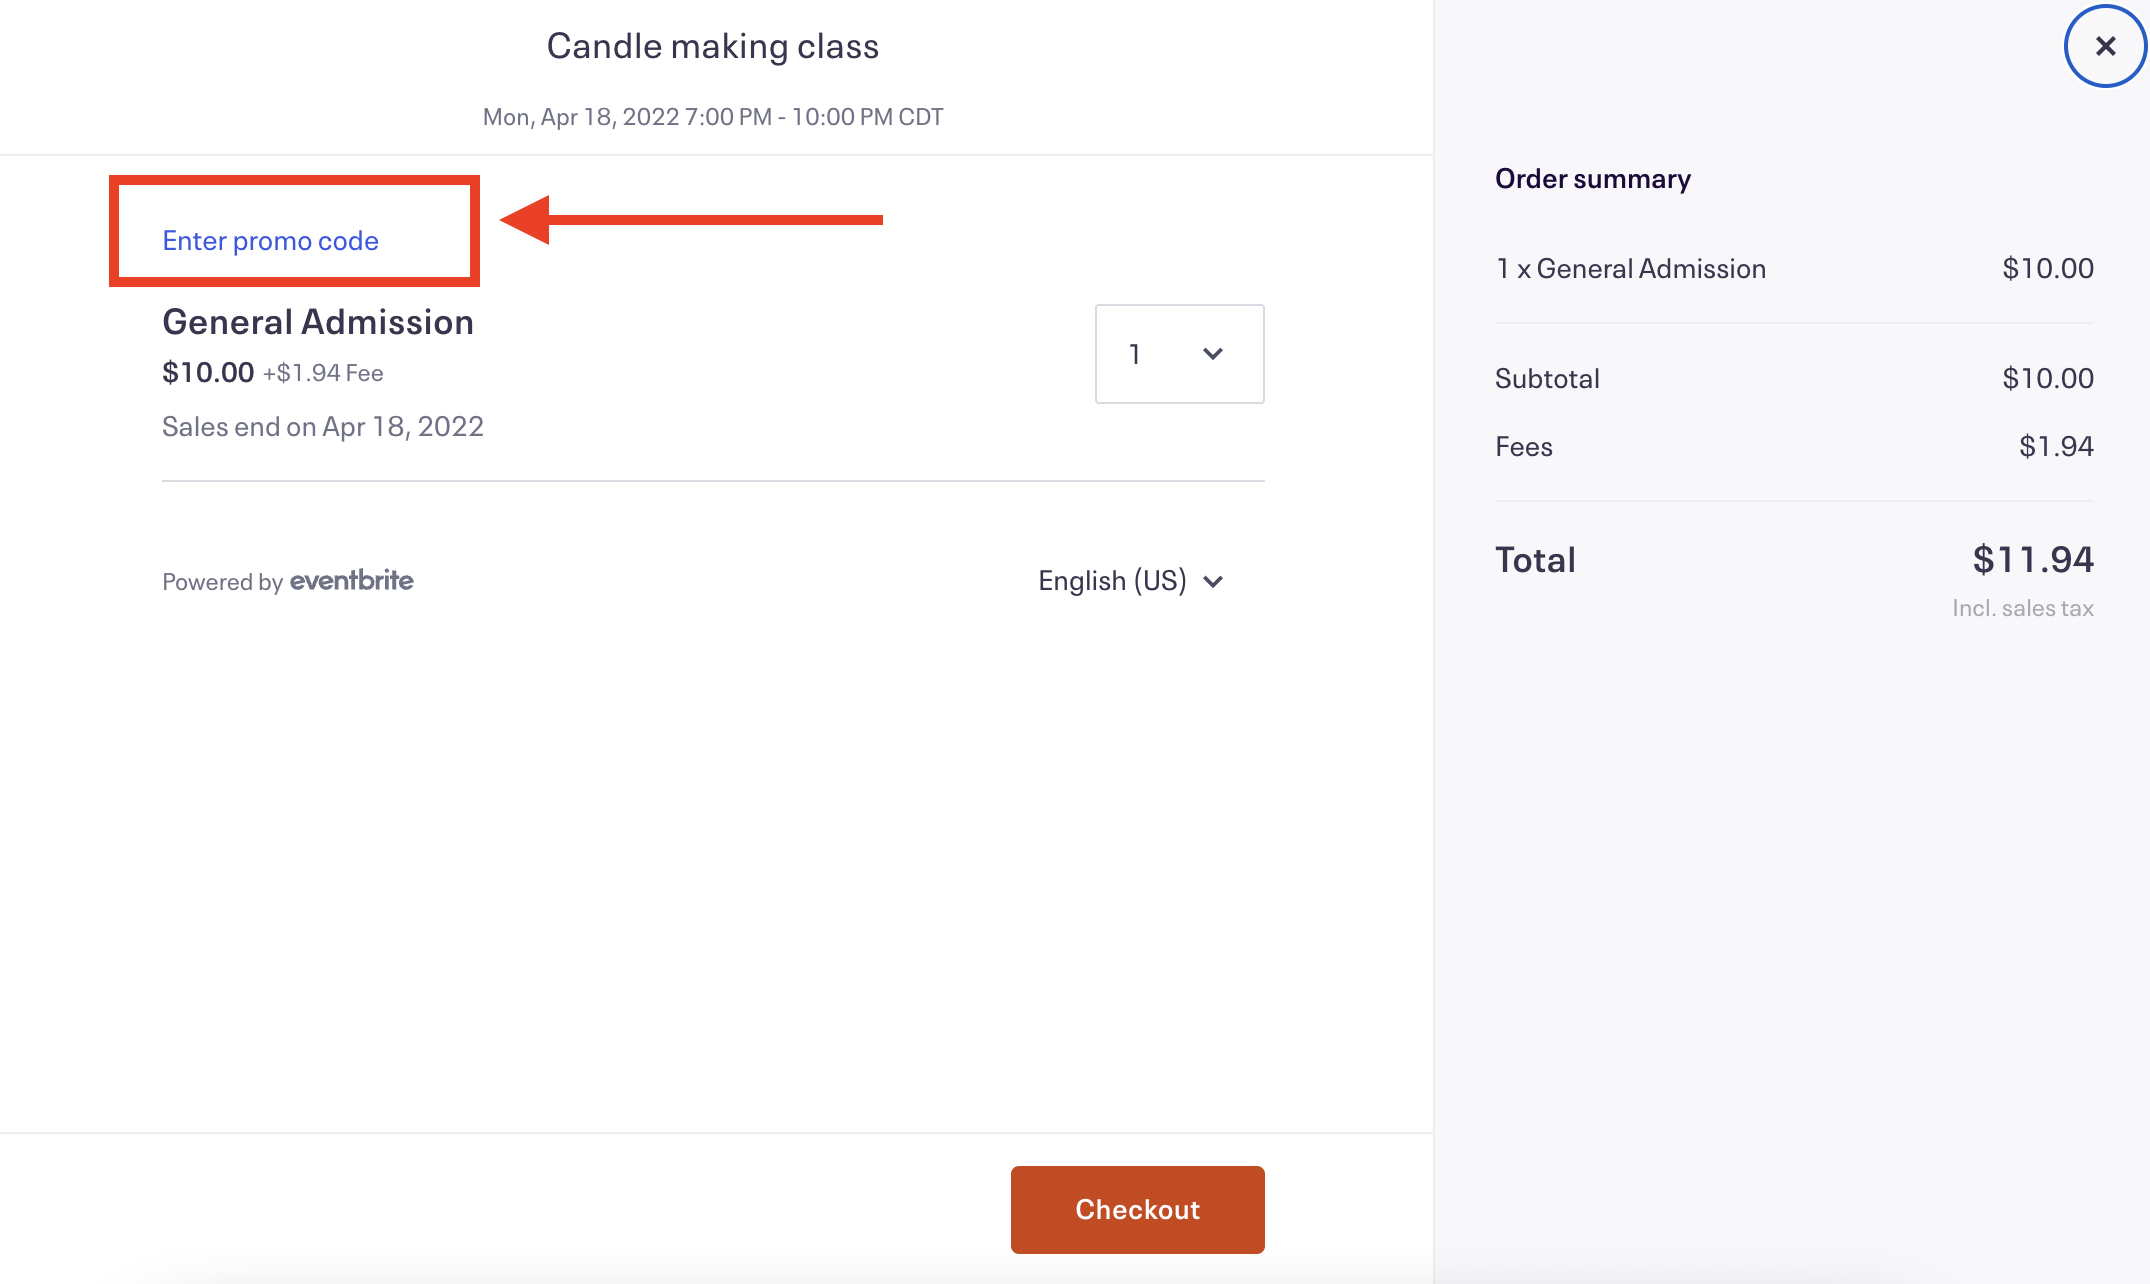
### How do users apply a promo code to my event?
When the ticket options appear, the user make click **Enter promo code** (in the upper left corner, above the first ticket option).
From there, they may type in your code and click **Apply**.
* If the code is valid, they will see the "Price" and "Fee" update to the discounted amount, or the hidden ticket will appear.
* If the code is showing as "not valid", the user must check to make sure it's entered correctly and try again.
* If the code isn't working, they must contact you (the event organizer).
From there, they may proceed to select their tickets and check out.
### How do I delete, update, or share existing codes?
Mouse over the arrow next to a code. From there:
* Click **Configure code** to update the code settings.
* Click **Change ticket selection** to change the tickets this code applies to.
* Click **View shareable link** to get a sharable link. This link automatically applies your code during checkout.
* Click **Delete** to remove this code. This option is only available on unused codes.
To bulk delete unused codes across all events:
1. Click **Delete unused codes**.
2. Choose the type of codes you want to delete.
3. Click **Continue** and review your settings.
4. Click **Delete**.
### How do I see promotion code usage?
For a quick overview of your code activity, go to “Tickets” and select “Promo codes”. You can also view promotion code usage in your Sales by ticket type and your Orders report.
\
**Promotions Overview**
For an overview of promotion code usage, go to “Tickets” and click “Promo codes”. This shows you the codes you created for this event and how many times each code has been used.
To see codes that apply to multiple events, go to “Marketing” and click “Multi-event promo codes”.
**Sales by ticket type report**
To view promotion code usage with detailed order information, check out your Sales by ticket type report.
1. Go to your Reports workspace.
2. Choose **Sales by ticket type**.
3. Click **Show Columns** and make sure that “Discount” (under Order Info) is checked.
4. Click “Update report”. The Discount column will list any promotions applied to attendee registrations.
**Orders report**
View your [Orders report](https://www.eventbrite.co.uk/support/articleredirect?anum=6549) to see basic order information, like name, email, and tickets ordered. Any promotional code that was used on an order will display after the ticket name like this:
* Type of ticket they ordered - (DISCOUNT AMOUNT and CODE USED)