How to Make a Multi-Event Ads Campaign
Market all your upcoming events with one, quick campaign.
Multi-Event Ads
Multi-Event Ads let you automatically promote all of your upcoming events on Facebook & Instagram for as little as $2/day. Get started here.
Here’s how they work:
Eventbrite Boost automatically builds a Facebook product catalog of your live events -- complete with images, dates, locations, and price.
Eventbrite Boost creates audiences of past & potential attendees to target with ads
You create a universal ad creative template that works for all of your events
People interested in an event will receive a specific ad for that event Events automatically get added to the ad when you announce them. And then they get removed from the ad after they sell out or happen.
Creators prefer Multi Event Ads because:
They can “set and forget” their ads
They market a lot of events with very little budget
The returns are higher than a normal ad campaign
This guide will cover:
How to set up a Multi Event Ad Campaign
Best Practices for your Multi Event Ad Campaign
Maintenance & upkeep for your campaign after launch
Step 1: Select Accounts
You’ll first choose the Ad Account you’d like to finance your campaign with.
Next you’ll choose the Facebook Page you want your ad to run from, as well as the associated Instagram Account.
Then select your respective Facebook Pixel.

Step 2: Select Event Catalog
Click the Generate button to create your Product Catalog.
Choose the Eventbrite Organization you’d like to create the product catalog for via the first dropdown menu "Select Eventbrite Organizer" (based on the EB organization you synced to your profile).
If you’ve already created a product catalog with a past Multi Event Ads campaign, you can select it in the second dropdown – ie, no need to re-generate.

Takeaway: In order to generate this product catalog, your ad account first has to be inside of a Business Manager account - for more context on how to set this up click here. You can also use this section to create a catalog of shows from multiple orgs/venues.
Step 3: Catalog Segment
If you’d like to segment the shows that your Multi Event Ad campaign is advertising there are a few options:
Time Segments
All Events
Events that are happening within 30 days (Closeout)
Events on sale in the past 30 days (On-Sale)

We recommend starting with the All Events segment if you have between 10-20 events that have tickets available for purchase. If you have more than 20 events available for purchase then we recommend using the Happening Within 30 Days segment to start.
Location Segments
If you have multiple events in separate locations under one org, this option can help you segment which events are being advertised.
There is no need to specify a location here if all your events are in the same place.
Product Catalog Exclusion
Below you can choose which events to exclude from being advertised by your campaign. Check the blue box to the left of the event name to remove it from your catalog.
If you notice multiple options for a singular event here, it means that you have a recurring event series or multiple ticket types for an event.

You can view excluded events at the bottom of this section, then click "Save" to save your Product Catalog before continuing.

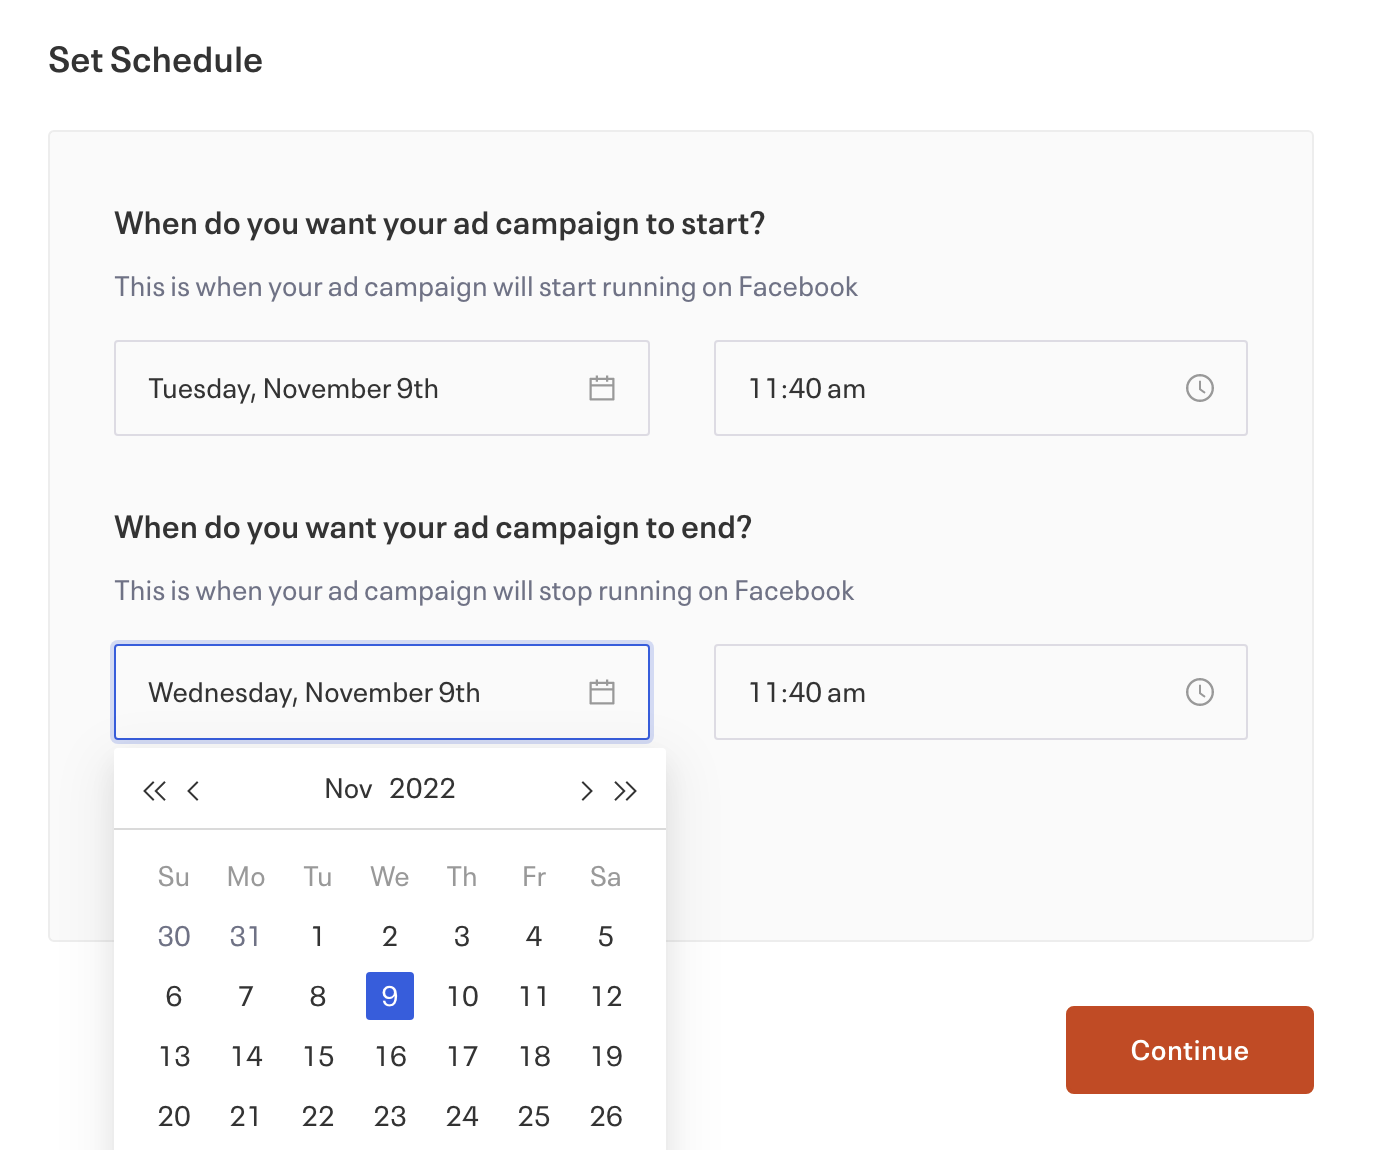
Step 4: Schedule
Schedules will fluctuate depending on your own event calendar, but generally speaking, here's our advice:
We recommend running your Multi Event Ads for at least one year, so long as you are continuously hosting events.

If you’re not continuously hosting events, then you should run them up until your last event finishes.
You have the option to "Pause" your campaign at any time, and "Resume" when you'd like to pick things back up.
Takeaway: When new events go on-sale, they'll automatically be added to your campaign's product catalog. When an events passes or becomes no longer available, it will be automatically removed from your campaign.
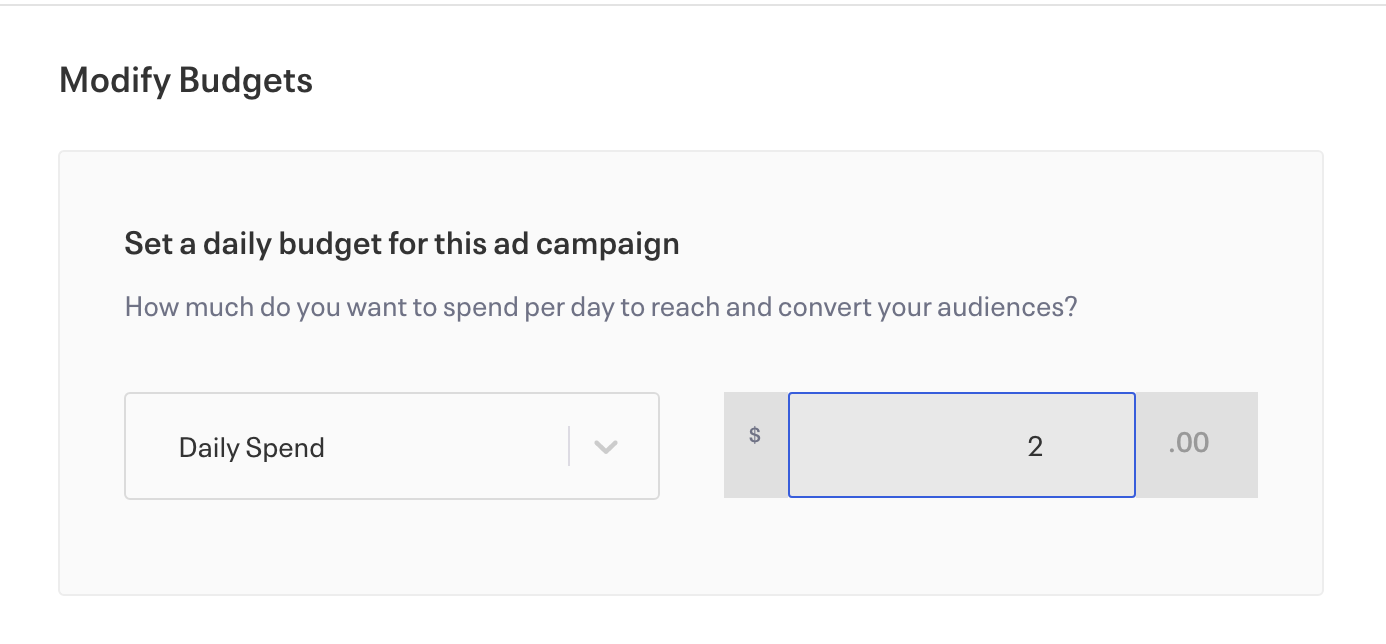
Step 5: Budget
Budgeting for Multi Event Ads is slightly different than single-event ads, and is meant to be both time and cost efficient.
We recommend starting with a budget of $2 USD/day while using the Daily option. You can always increase your budget to a higher amount like $5 USD/day, followed by $10 USD/day to $20 USD/day during times of higher volume or demand.

We do not recommend starting with a higher advertising budget to start when using Multi Event Ads. It is better to start with a lower budget and increase over time.
Feel free to send us a note at [email protected] or contact us through our support chat to get a more personalized budget recommendation.
Step 6: Modify Target Audiences
We recommend inputting relevant interests & using our default targeting.
Multi Event Ads will automatically target both potential & past attendees of your events.
The audience targeting potential attendees is made up of interests you choose ("Add Interests" section).
The second audience targeting past attendees ("Expand Your Reach" section) is made up of your past Eventbrite event attendees, your Facebook Page & Facebook Event engagers, your Instagram Page engagers, and any web traffic from your Facebook Pixel.

To use our default targeting interface, you'll want to start by building the interest audience! Interest targeting is the most common type of targeting on Facebook & Instagram, and helps you reach brand new people based on common sets of interests.
Enter in a minimum of 5-10 relevant interests to your event so you have a decently sized audience, prioritizing quality over quantity.
Once you’ve entered a few interests, you can see relevant recommended interests from Facebook by clicking on the dropdown, or hitting the "+2, +5, +10" buttons.

After you configure your interest audience, you'll configure the "Expand Your Reach" audience, which reaches existing fans.

Step 7: Design Ad
The nice part about this campaign is that the creatives are made automatically (meaning you don’t have to build a single ad copy).
The placeholders {{product.name}}, {{product.brand}}, {{product.custom_label_0) correspond to the name of the event, the location of the event, and the date of these event respectively.
These placeholders will pull the info from your Eventbrite event catalog to automatically build the ad copy for you.
Feel free to customize this section to your liking. But make sure to not mess with the placeholders or you’ll break the automation of the campaign. Any changes you make to any of these components will be reflected across all of your dynamic ad's copies.
Use the dropdown above the creative preview, you can preview the ad copy for each event that is advertised by the campaign.
You can always change the image on a per event basis using the "Edit Catalog Images" button. If you want to change anything pulled in by the placeholders, you'll have to change it on your event listing page.

Pro Tip: Because the ad creatives are entirely automated, if you want to change any info pulled by the placeholders, you’ll have to change the respective info on your event listing page.
Campaign Maintenance
The only things you'll need to do once you have launched the campaign include:
Updating the images for new events once they're added if you don't want to use the stock image on the event listing page
Changing up your ad copy every month or so to keep your creatives fresh
Updating your budget if you see good returns (we don't recommend exceeding $5-10 day here)
Extending the schedule of the campaign
Excluding events from the campaign in the "Select Catalog Segment" section when you don't want a certain event being advertised
Last updated